Growing Herbs Is Easy When You Have The Right Set Up
Are you sick of buying expensive fresh herbs when you have a recipe you want to make or you are sick of using dried herbs. Growing herbs are really easy when you have the right set up. Herbs don’t take a lot of room and you can easily grow them in planters and pots.


Growing Herbs Is Easy When You Have The Right Set Up
You’ll find that the difference between a herb corner that thrives and one that languishes rarely comes down to luck. It almost always comes down to a few deliberate choices you make in how you set things up, with an eye for light, soil, water, and habit.
Why the right set up matters
You might imagine herbs as resilient, forgiving things that will put up with whatever you give them. In truth, they respond to order and to the small conveniences you provide. When your set up provides predictable light, proper drainage, and easy access for harvesting, you’ll find the plants behave like grateful, well-mannered guests.
If you invest a little thought up front, you’re rewarded with large returns: healthier flavor, fewer pests, and far fewer moments of confusion where you ask yourself whether you under-watered or committed a far worse error. The experience becomes pleasurable rather than a list of chores.
The small choices that make a big difference
You’ll notice quickly that correct pot size, the right potting mix, and the habit of checking soil moisture are not exciting decisions, but they are decisive. Those small choices compound into plants that look like they know what they’re doing. That steadiness is how you get herbs that feel like they belong in your kitchen.
The joy of habit
Growing herbs successfully is as much about rhythm as it is about knowledge. You’ll water, prune, smell, and harvest at predictable intervals. In time, caring for herbs becomes a small domestic ritual — one that rewards consistency more than grand gestures.
Choosing the right herbs for you
Choosing the herbs that will thrive for you is part practical, part sentimental. Think about what you cook, what scents you enjoy, and how much time you can regularly give to maintenance. Some herbs demand nearly constant attention; others are more self-sufficient.
Start with a mix of quick-reward, low-maintenance varieties and one or two that feel indulgent but rewarding. In a few months you’ll have a small repertoire that transforms simple meals and smells like a small triumph.
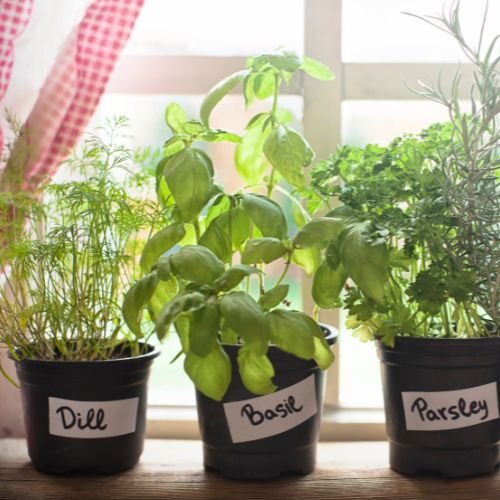
Easy beginner herbs
These herbs will forgive slipups, grow quickly, and give you regular harvests. They’re the ones you’ll reach for in the morning while you make coffee and remember how good it is to have fresh flavor at hand.
| Herb | Light | Water | Pot size | Notes |
|---|---|---|---|---|
| Basil | Full sun (6+ hours) | Regular, keep slightly moist | 6–8″ | Pinch regularly to promote bushiness |
| Chives | Full to part sun | Moderate, allow topsoil to dry | 4–6″ | Perennial in many climates; mild onion flavor |
| Parsley | Part to full sun | Consistent moisture | 6–8″ | Biennial; blooms in second year |
| Mint | Part shade to sun | Likes moist soil | 8–12″ (contain aggressively) | Invasive outdoors; best in its own pot |
| Rosemary | Full sun | Drier, well-drained | 8–10″ | Woody, Mediterranean; tolerates neglect |
| Thyme | Full sun | Drier, well-drained | 4–6″ | Compact, drought-tolerant |
| Cilantro | Part sun | Regular moisture | 6–8″ | Quick to bolt in heat; succession sow |
Culinary, medicinal, and ornamental uses
You’ll find that some herbs are primarily culinary, slotted into meals with ease; others are grown for fragrance or a particular health tonic; still others are chosen because they are simply beautiful. Mix uses to keep your garden both useful and charming. A thoughtful selection will have at least one plant that delights you simply by visiting it.
Location and light
Light is the single most important factor for herbs. You’ll see the difference quickly: a plant on a bright sill will be compact and fragrant, while one in dim light will stretch and look tired. Before you buy anything, take a few days to observe where light falls in your space.
Some herbs are content with partial sun; others insist on full, bright light. If you plan to keep a kitchen garden, identify the sunniest shelf or the quietest corner of a balcony where you can place containers and tend them easily.
Indoor light needs
If you’re growing indoors, aim for a south- or west-facing window whenever possible. The sun’s angle and intensity will change with the seasons, so you’ll need to move pots slightly over the year. When natural light is limited, supplement with artificial light to keep plants compact and flavorful.
Indoor herb gardens reward observation. You’ll learn to read leaves for light deficiency — pale, long stems, and sparse foliage tell you more quickly than any instruction manual.
Outdoor light needs
When you place herbs outdoors, choose a location that matches the plant’s native habits. Mediterranean herbs like rosemary and thyme ask for full sun and excellent drainage. Tender herbs like cilantro may prefer some afternoon shade. Pay attention to microclimates on your porch or balcony where wind or reflected heat can stress plants.
Using grow lights
If you don’t have a bright window, a simple full-spectrum LED grow light can be transformative. Position the light about 6–12 inches above the foliage and keep it on for 12–16 hours daily for most herbs. You’ll save yourself the disappointment of weak, leggy growth by providing steady, artificial light when necessary.
Containers and soil
Your choice of containers and potting mix matters more than you think. Herbs will forgive many things, but waterlogged roots and poor aeration are unforgiving. Use containers that drain well and a potting soil designed for containers — not garden soil — to keep moisture balance right.
Think of your container as an ecosystem in miniature. The soil is its capacity for life, and the pot determines how much room roots have to breathe and spread.
Soil and potting mix
Choose a light, well-draining potting mix with good organic matter and perlite or vermiculite for aeration. Herbs generally dislike heavy, compacted soils. You can amend a basic potting mix with coarse sand or perlite for herbs that prefer drier conditions.
A good potting mix will feel airy and loose; it should hold moisture without becoming a swamp. Mix a slow-release organic fertilizer into the potting soil if you prefer less frequent feeding.
Drainage and saucers
Never let your pots sit in stagnant water; roots will rot. Use saucers that allow you to empty excess water, or elevate pots slightly on pot feet or gravel so air can circulate. You’ll avoid many problems simply by ensuring the bottom of the pot allows extra moisture to escape.
Watering and drainage
Watering is where people most often misjudge their herbs. You’ll do better by learning your plants’ individual rhythms rather than following a rigid schedule. Feel the soil. Lift the pot. Use a moisture meter if you like numbers. Develop a small routine that keeps you aware without becoming onerous.
Consistent, appropriate watering gives herbs confidence. They’ll reward you with flavor and growth rather than an endless, anxious struggle to keep leaves alive.
How to water
Water slowly and deeply so water reaches the root zone. For most herbs, let the top inch of soil dry before watering again, except for herbs that prefer constant moisture like basil and cilantro. Water in the morning whenever possible; it mimics natural cycles and reduces the risk of fungal problems.
Use a watering can with a narrow spout for precision on windowsills, and avoid overhead watering that wets foliage unnecessarily. When you water less frequently but more thoroughly, roots grow downwards and plants become sturdier.
Signs of overwatering and underwatering
You’ll learn to read symptoms: yellowing leaves and a droop that doesn’t recover after watering often indicate root problems. Crispy, curled leaves signal thirst. Identifying the difference quickly will save plants.
| Symptom | Likely Cause | What to do |
|---|---|---|
| Yellowing lower leaves, wilting despite wet soil | Overwatering/root rot | Remove dead material, repot into drier mix, improve drainage |
| Dry, brittle leaves and wilting when soil is dry | Underwatering | Water deeply, increase frequency, check pot size |
| Soft, mushy stems at soil level | Severe overwatering | Inspect roots, trim rotten parts, repot immediately |
| Brown leaf tips with otherwise healthy foliage | Salt buildup from fertilizer | Flush soil with water, reduce fertilizer frequency |
Tools to help
A moisture meter, a watering can with a narrow spout, and a spray bottle for humidity-sensitive herbs will simplify your life. A simple saucer or tray that you can empty prevents accidental standing water. Invest in a good pair of pruning scissors and you’ll avoid tearing stems when you harvest.
Feeding and fertilizing
You won’t need to feed herbs as much as some vegetables, but a little nutrition keeps them productive. Over-fertilizing produces lush foliage with diminished flavor, so use restraint. Think of feeding as occasional encouragement rather than daily pampering.
Choose a light-handed approach: a balanced, slow-release organic fertilizer at planting, with periodic liquid feed during the growing season if growth slows or leaves look pale.
When to feed
Feed herbs at planting and then sparingly during the growth period. For container-grown herbs, a light monthly feed with a balanced liquid fertilizer during active growth is usually enough. For slow-growing, woody herbs like rosemary, feed only twice a year.
Types of fertilizers
You can use a balanced 10-10-10 or 5-5-5 for general feeding, or choose a fertilizer formulated for herbs and vegetables. Organic options include compost tea, fish emulsion, or kelp meal. Each delivers nutrients differently: slow-release granules keep nutrient levels steady, while liquid feeds give a quick boost.
Organic options
Organic feeds often improve soil biology along with nutrition. Compost, worm castings, and compost tea introduce microbes that help convert nutrients into plant-available forms. You’ll notice improved flavor and resilience when you let soil biology do some of the work.
Pruning and harvesting
Harvesting is the most pleasurable part of growing herbs. You’ll cut stems for dinner, smell the oils, and think about how small acts can transform a meal. Harvest often and lightly; the plant responds by becoming bushier and more productive.
Prune to shape, to remove old growth, and to prevent flowering if you want prolonged leaf production. Flowering is not a disaster, but it signals a change in the plant’s priorities — often less leaf and more seed.
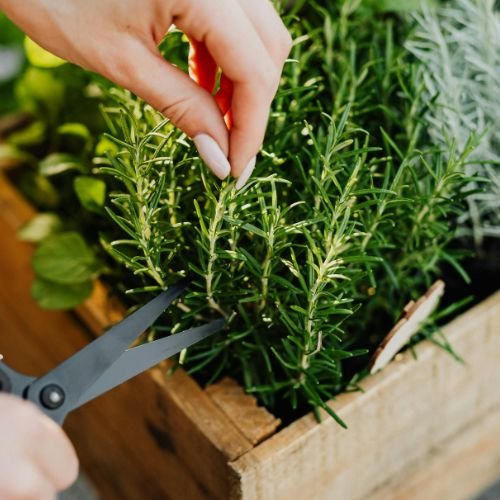
How to harvest without harming the plant
Always cut above a pair of leaves or a node to encourage branching. For herbs like basil, pinch the top pairs to keep the plant compact. When you harvest no more than one-third of the plant at a time, recovery is quick and stress is minimal.
Use a clean, sharp pair of scissors to make even cuts. The less you tear, the less you invite pests and disease.
Pruning schedules
Set a gentle rhythm: light pruning every couple weeks during the growing season and a more thorough shaping in spring or early summer. Woody herbs like rosemary and sage respond well to selective shaping after flowering. Annual herbs can be cut back more aggressively to encourage new growth.
Pest and disease management
You’ll rarely have to wage all-out war with pests if you maintain a healthy environment. Most problems can be prevented with good air circulation, clean tools, and the right cultural conditions. When pests appear, act promptly with the least invasive methods first.
Confidence and calm will serve you well. Start with inspections, then move to soap sprays, hand removal, and biological controls before chemical solutions.
Common pests and how to respond
Here are typical pests you’ll meet and sensible responses you can use at home.
| Pest | Signs | Organic control |
|---|---|---|
| Aphids | Clusters on new growth, sticky residue | Blast with water, insecticidal soap, introduce ladybugs |
| Spider mites | Fine webbing, stippled leaves | Increase humidity, miticide or soap spray, remove infested leaves |
| Whiteflies | Tiny white insects when disturbed | Yellow sticky traps, insecticidal soap |
| Slugs/snails | Ragged holes, slime trails | Hand-pick at night, beer traps, metal barriers |
| Fungus gnats | Tiny flies near soil | Let soil dry between waterings, sticky traps, hydrogen peroxide soil drench |
Disease prevention
Good hygiene helps: avoid wet foliage overnight, don’t overcrowd plants, and clean tools between plants. Remove and compost diseased material away from healthy plants and replace infected soil if problems persist. Disease often announces itself before it’s too late; act on early signs.
Propagation and starting from seed
You’ll enjoy watching a seed become a reliable plant. Growing from seed is economical and satisfying; propagation by cuttings is quicker and gives you a clone of a plant you already love. Both methods have their moments and merits.
If you’re impatient for results, take cuttings of herbs like rosemary, mint, basil, and thyme — they usually root easily in water or a light potting mix. Seeds are better when you want a larger, more varied selection at lower cost.
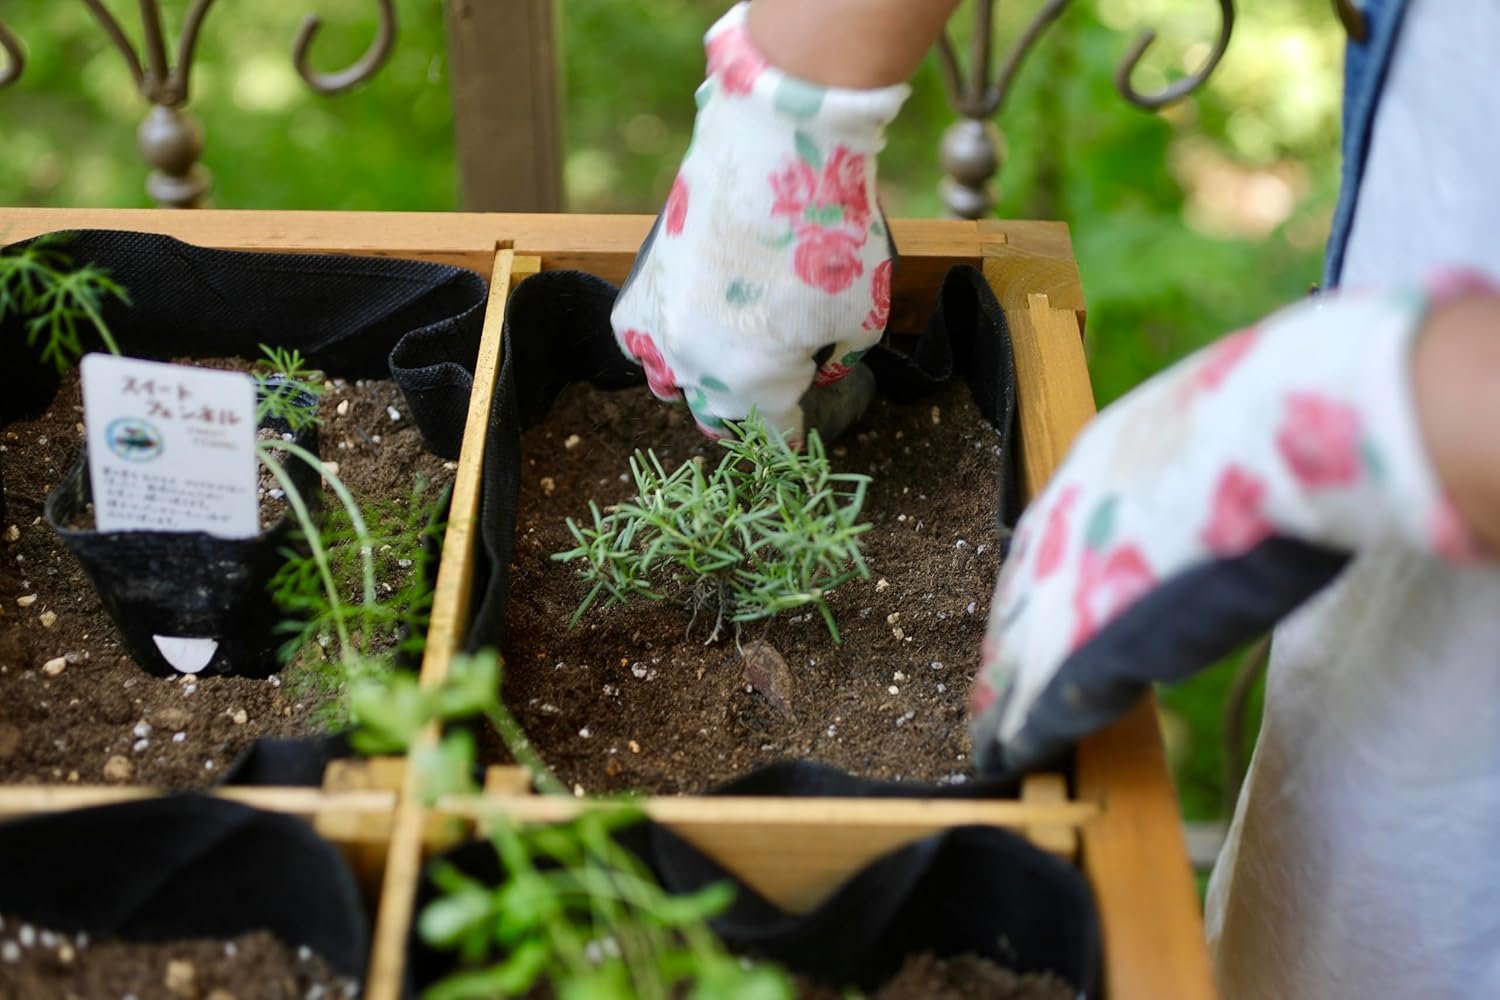
Starting from seed
Sow small seeds on the soil surface or lightly cover them, keep the soil moist and warm, and be patient. Seedlings need bright light and gentle watering; if they stretch, you’ll need to increase light and reduce watering slightly. Label trays so you remember what you planted.
Propagating by cuttings
Cut 3–4 inch stem sections just below a node, remove lower leaves, and place in water until roots form. Alternatively, root cuttings in a moist rooting medium with a bit of perlite. Once roots are an inch or two long, transplant to pots. Cuttings will give you a mature-flavored plant faster than seeds.
Seasonal care and moving plants
Herbs are seasonal friends; some are true perennials in mild climates, while others behave like annuals. You’ll plan according to your local climate, moving containers inside before the first hard frost, or shading plants during heat waves.
A seasonal plan keeps your herbs thriving year-round and reduces surprises. Knowing what to do with your pots when the weather changes will save you many last-minute scrambles.
Summer care
In hot weather, check moisture more often and provide afternoon shade for heat-sensitive herbs. Mulch the soil surface to conserve moisture and keep roots cool. You’ll also need to watch for bolting; regular harvesting and shade can delay it.
Winter care and overwintering
If you live where temperatures fall below a plant’s tolerance, move pots indoors to a bright, cool area. For hardy herbs planted in-ground, protect roots with a thick mulch layer. Reduce watering as growth slows and consider supplemental light for long winters.
Designing your herb garden
Designing is half practicality and half pleasure. You’ll place herbs where you can harvest them easily, where they look good from the window, and where their practical needs — light and water — will be met. A small, considered layout will save you time and suit your daily habits.
Think of your herb garden as a set of relationships: which plants like each other, which will overshadow others, and which you want within arm’s reach while cooking.
Layout tips for small spaces
If you have a sill or balcony, place frequently used herbs like basil and chives closest to your door. Taller, sun-loving plants can go behind lower ones. Use vertical space with hanging pots or tiered shelves to increase capacity without crowding.
Companion planting
Some herbs benefit each other and the vegetable plants nearby. Basil is often planted near tomatoes; mint can deter pests but needs its own pot; thyme and rosemary are good near vegetables that tolerate dry soil. Companion planting is a gentle way to improve health without complicated interventions.
Harvesting, preserving, and using herbs
You’ll find preserving herbs as satisfying as growing them. Fresh herbs are best, but drying, freezing, and making oils or butters extends utility across seasons. Preservation lets you store a little of summer for the gray days of winter.
A small routine — pick, wash, pat dry, and preserve — will make seasonal abundance into year-round pleasure.
Drying and freezing
Hang bundles upside down in a cool, dry place to dry small-leaf herbs like thyme and oregano. For basil and parsley, freezing in an ice cube tray with a little water or oil preserves flavor better than drying. Label and date your jars or cubes so you always know what winter meal you’re opening.
Making herb butters, oils, and salts
Mix chopped herbs into softened butter for an instant compound butter, or infuse neutral oil with rosemary or garlic for dressings. Mix salt with chopped herbs and dry for flavored finishing salts. These small preserves are excellent gifts and make cooking feel slightly ceremonial.
Minimalist setups and advanced options
You don’t need a greenhouse or even a balcony to grow herbs. A narrow windowsill with three pots can satisfy most needs. At the other end of the spectrum, you might enjoy the precision of hydroponics or a smart garden that turns plant care into a low-friction ritual.
Choose the level of technology that fits your temperament. Some people love the hands-on simplicity of soil; others prefer sensors and timers that remove human error.
Windowsill box — low-tech, high-return
A shallow planter lined with proper potting mix and placed on a sunny sill will serve you well. Water from the top, rotate plants occasionally, and you’ll have herbs that are easy to harvest and impossible to ignore. This setup requires minimal tools and delivers maximum daily satisfaction.
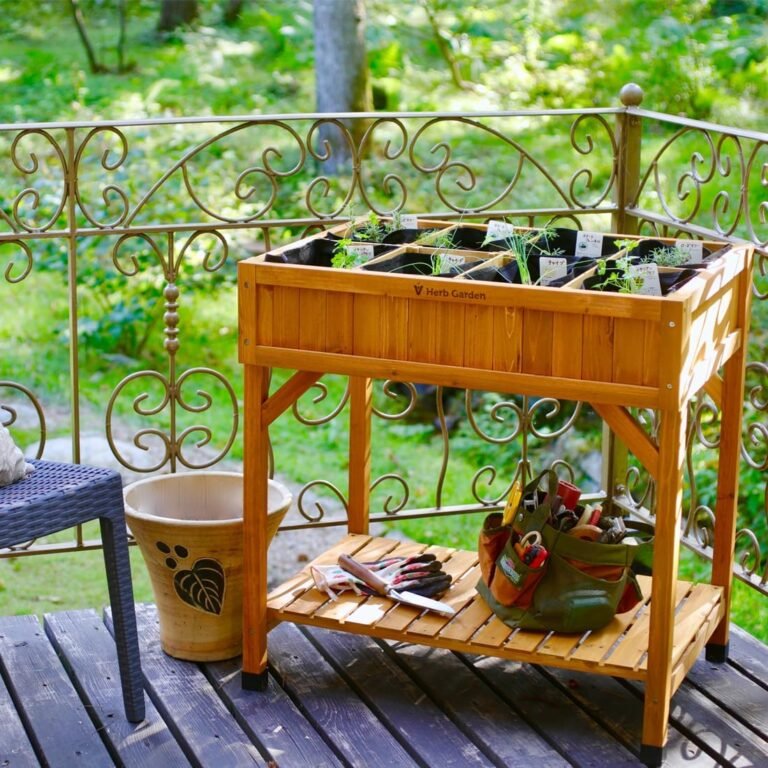
Raised beds and vertical gardening
If you have a yard, raised beds give you better control over soil quality and drainage. Vertical planters expand capacity and create a living wall of flavor. Both approaches let you combine herbs with small vegetables and flowers for a multi-purpose plot.
Hydroponics and smart gardens
These systems use water and nutrients rather than soil and can be economical in space and fuss. A small countertop hydroponic unit or smart grow box is useful if you want automated watering and light. They reduce the chance of human error, though some flavor purists prefer soil-grown herbs.
Tools and supplies checklist
A tidy list keeps you prepared without clutter. You’ll find that a few well-chosen tools make the work pleasant and efficient. Keep the essentials within reach, and store extras sensibly.
| Essential | Purpose |
|---|---|
| Quality pruning scissors | Clean harvests and pruning |
| Watering can with narrow spout | Precise watering |
| Potting mix (soilless) | Proper drainage and nutrition |
| Pots with drainage holes | Prevent root rot |
| Moisture meter (optional) | Help diagnose watering issues |
| Small hand trowel | Potting and transplanting |
| Labels and marker | Identify varieties and sowing dates |
| Slow-release organic fertilizer | Baseline feeding |
| Small fan (for indoor setups) | Improve air circulation |
Final thoughts and encouragement
You will notice that growing herbs is less about grand horticultural theories and more about a patient, modest routine that fits into your day. Your kitchen table will become a place for small triumphs: a handful of basil for pasta, the bright tang of lemon balm in tea, the neat cuttings you tuck into a vase and forget about until you need them.
Treat your herb setup as a conversation you’re having with your home. You’ll respond to the plants’ needs, and they’ll answer in scent and flavor. With a careful set up — light where it’s needed, pots that drain, soil that breathes — you’ll find the work easy and the results reliably satisfying. Over time, you’ll accumulate not just herbs, but the steady, domestic pleasure of tending something that rewards small attentions with consistent bounty.