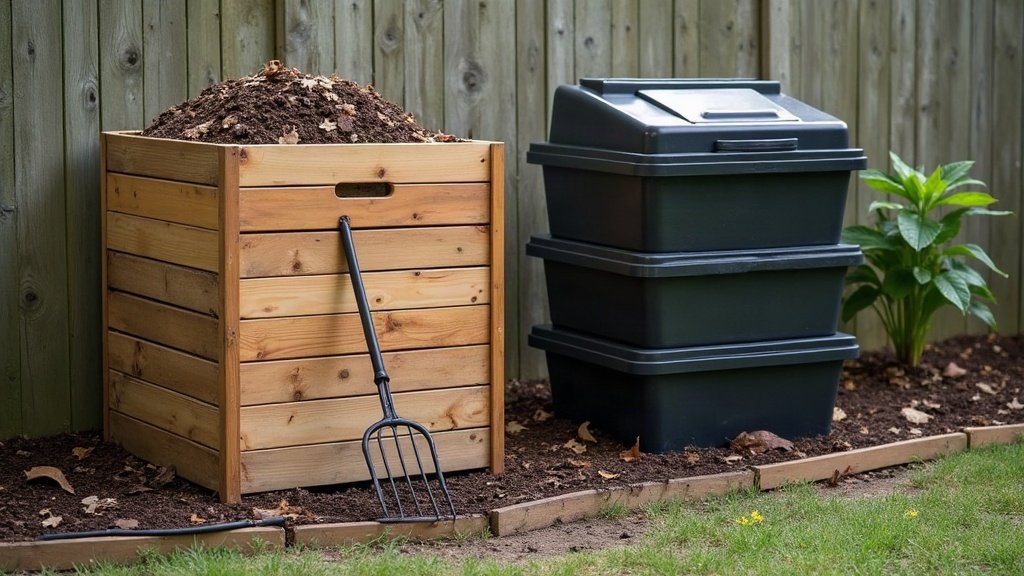
Composting and Worm Farms in the Backyard: A Beginner’s Setup
Every kitchen throws out a bin bag’s worth of vegie peels, coffee grounds and eggshells a week, and most of it goes straight to landfill where it just rots. A compost bay or a worm farm turns that same waste into something your garden actually wants. Neither setup needs to be complicated, and you do not need acreage. A worm farm fits on an apartment balcony. Here is how to get either one going without it turning into a smelly, fly-blown mess in month two.
Compost bay or worm farm: which suits your yard
A compost bay (or a simple bin) is the right call if you have got garden space, a decent volume of kitchen and garden waste, and you want to build up soil over beds or a whole yard. It handles bulkier stuff like prunings and lawn clippings that worms would struggle with.
A worm farm suits small courtyards, units and anyone who wants a tidy, mostly odourless system close to the back door. Worms process kitchen scraps efficiently and hand you back two useful things: worm castings for the soil and worm tea, a liquid you dilute and use as a garden feed. Plenty of backyards run both, the compost bay for bulky stuff and the worm farm for daily kitchen waste.
Setting up a compost bay properly
Pick a spot with part shade, sitting directly on soil or lawn rather than concrete, so worms and other soil life can move in. A three-bay timber system, a tumbler or a simple wire-mesh cage all work. What matters more than the container is the mix you put in it.
Good compost needs a rough balance of two things: browns, meaning dry carbon-heavy material like fallen leaves, shredded cardboard and straw, and greens, meaning wet nitrogen-heavy material like vegie scraps, coffee grounds and fresh grass clippings. Too many greens and you get a slimy, smelly pile. Too many browns and it barely breaks down. Layer them roughly and turn the pile every week or two with a fork to keep oxygen moving through it. A dry pile stalls, so give it a splash of water if it has not rained in a while.
Setting up a worm farm that does not die on you
Buy purpose-bred composting worms, usually tiger worms or red wrigglers, rather than digging worms out of the garden, which are a different species and will not thrive in a bin. Most kits are stacked trays: worms work through fresh scraps in the top tray, castings build up below, and worm tea drains into a sump at the bottom with a tap.
Sit the farm in a shaded spot out of direct afternoon sun, because worms cook fast in a hot plastic bin on a summer day. Start with a bedding layer of damp shredded newspaper or coconut coir, add the worms, and go easy on feed for the first couple of weeks while the colony settles in. Drain the worm tea sump regularly so it does not turn stagnant.
What actually goes in (and what never does)
Both systems are fairly forgiving once you know the short list of things to keep out.
- Good for both: vegie and fruit scraps, coffee grounds and filters, tea leaves, crushed eggshells, shredded paper and cardboard.
- Compost bay only: lawn clippings, small prunings and autumn leaves, since worm farms handle these poorly in volume.
- Keep out of both: meat, dairy, cooked or oily food, and anything treated with pesticide, since these attract vermin or upset the balance.
- Never add: glossy paper, synthetic materials or pet waste from cats and dogs, since these can carry pathogens you do not want near food-growing soil.
Troubleshooting smell, pests and other problems
A healthy compost or worm system should smell earthy, not rotten. A bad smell almost always means too much wet green material and not enough carbon, so dig in a good layer of dry leaves or shredded cardboard and turn it through. Fruit flies mean exposed scraps, so always bury fresh waste under existing material or a layer of browns rather than leaving it on top.
Rodents are the pest most people worry about, and the fix is straightforward: never add meat, dairy or cooked food, use an enclosed bin or bay rather than an open heap, and keep the base secure if rats are known in your area. If a worm farm looks like it is drowning, meaning the bedding is soggy and worms are climbing the walls, drain the tea sump and hold off on wet scraps for a week.
Using what you have made
Finished compost is dark, crumbly and smells like forest floor, and that usually takes a few months depending on how often you turn it. Dig it through garden beds before planting or spread it as a top mulch layer, and it is exactly the kind of organic matter that helps beds hold moisture through a dry Australian summer, which matters if you are setting up a low-maintenance native garden bed.
Worm castings work the same way but are gentler and more concentrated, so a thin layer around existing plants is plenty. Dilute worm tea to a weak tea colour before using it as a liquid feed, since it is potent enough to burn roots at full strength. Both are simply part of treating your backyard as a set of connected systems rather than a list of separate jobs, which is the whole idea behind planning an Aussie outdoor living space properly from the start.
Give it a season before you judge it
Both systems take a few weeks to find their rhythm, and that is normal rather than a sign you have done something wrong. Keep the greens-to-browns balance roughly right, keep the moisture level like a wrung-out sponge, and check in on it weekly. By the time the next dry spell hits, you will have free soil improver sitting in the backyard instead of scraps sitting in the bin.